Details for Uploading and Assembly
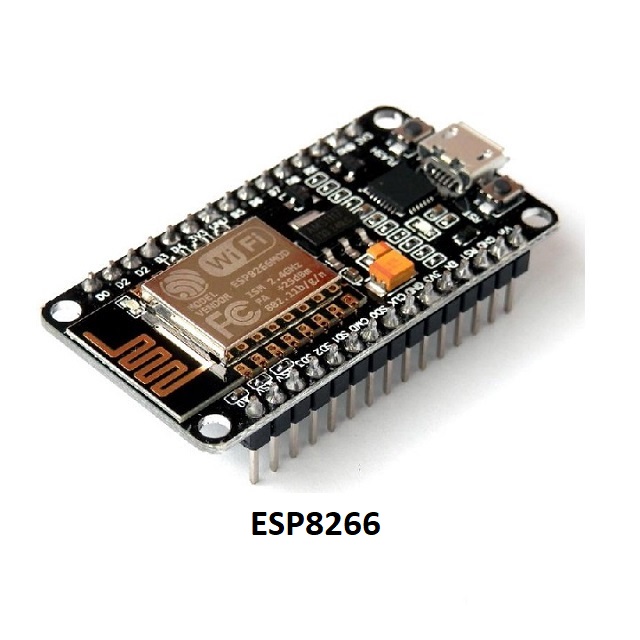
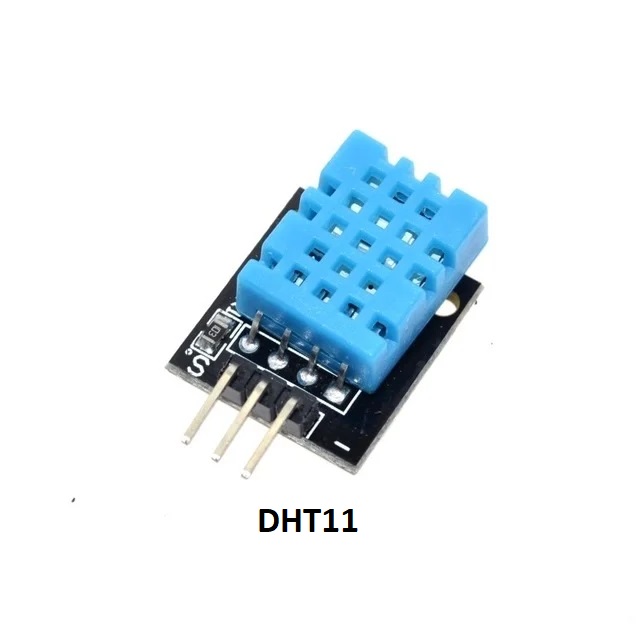
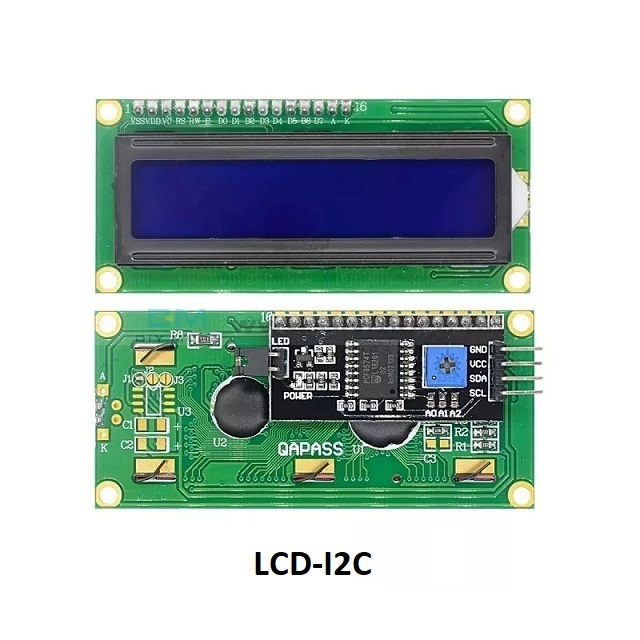
In this project you'll create a standalone web server with an ESP8266 that displays the temperature and humidity with a DHT11 sensor using the Arduino IDE. The web server you'll build can be accessed with any device that has a browser on your local network. The same temperature and humidity will be simultaneously displayed on LCD screen.
Parts included in the box
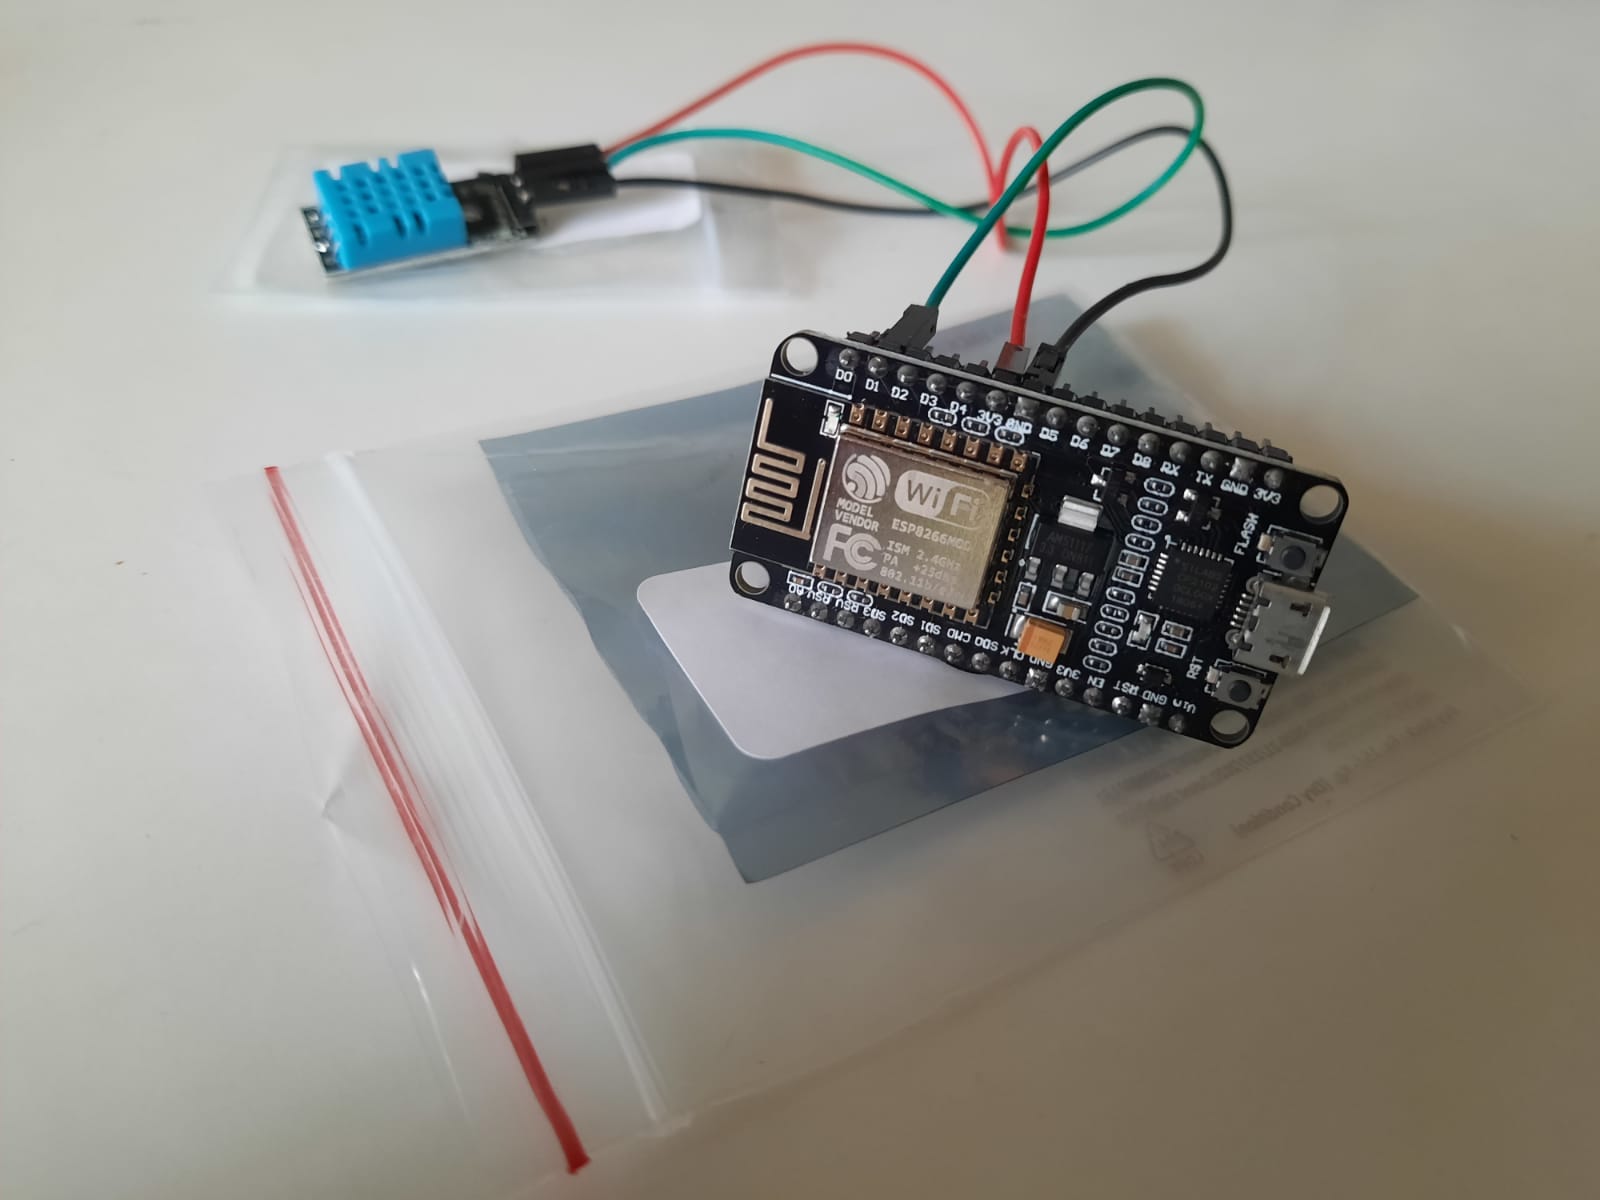
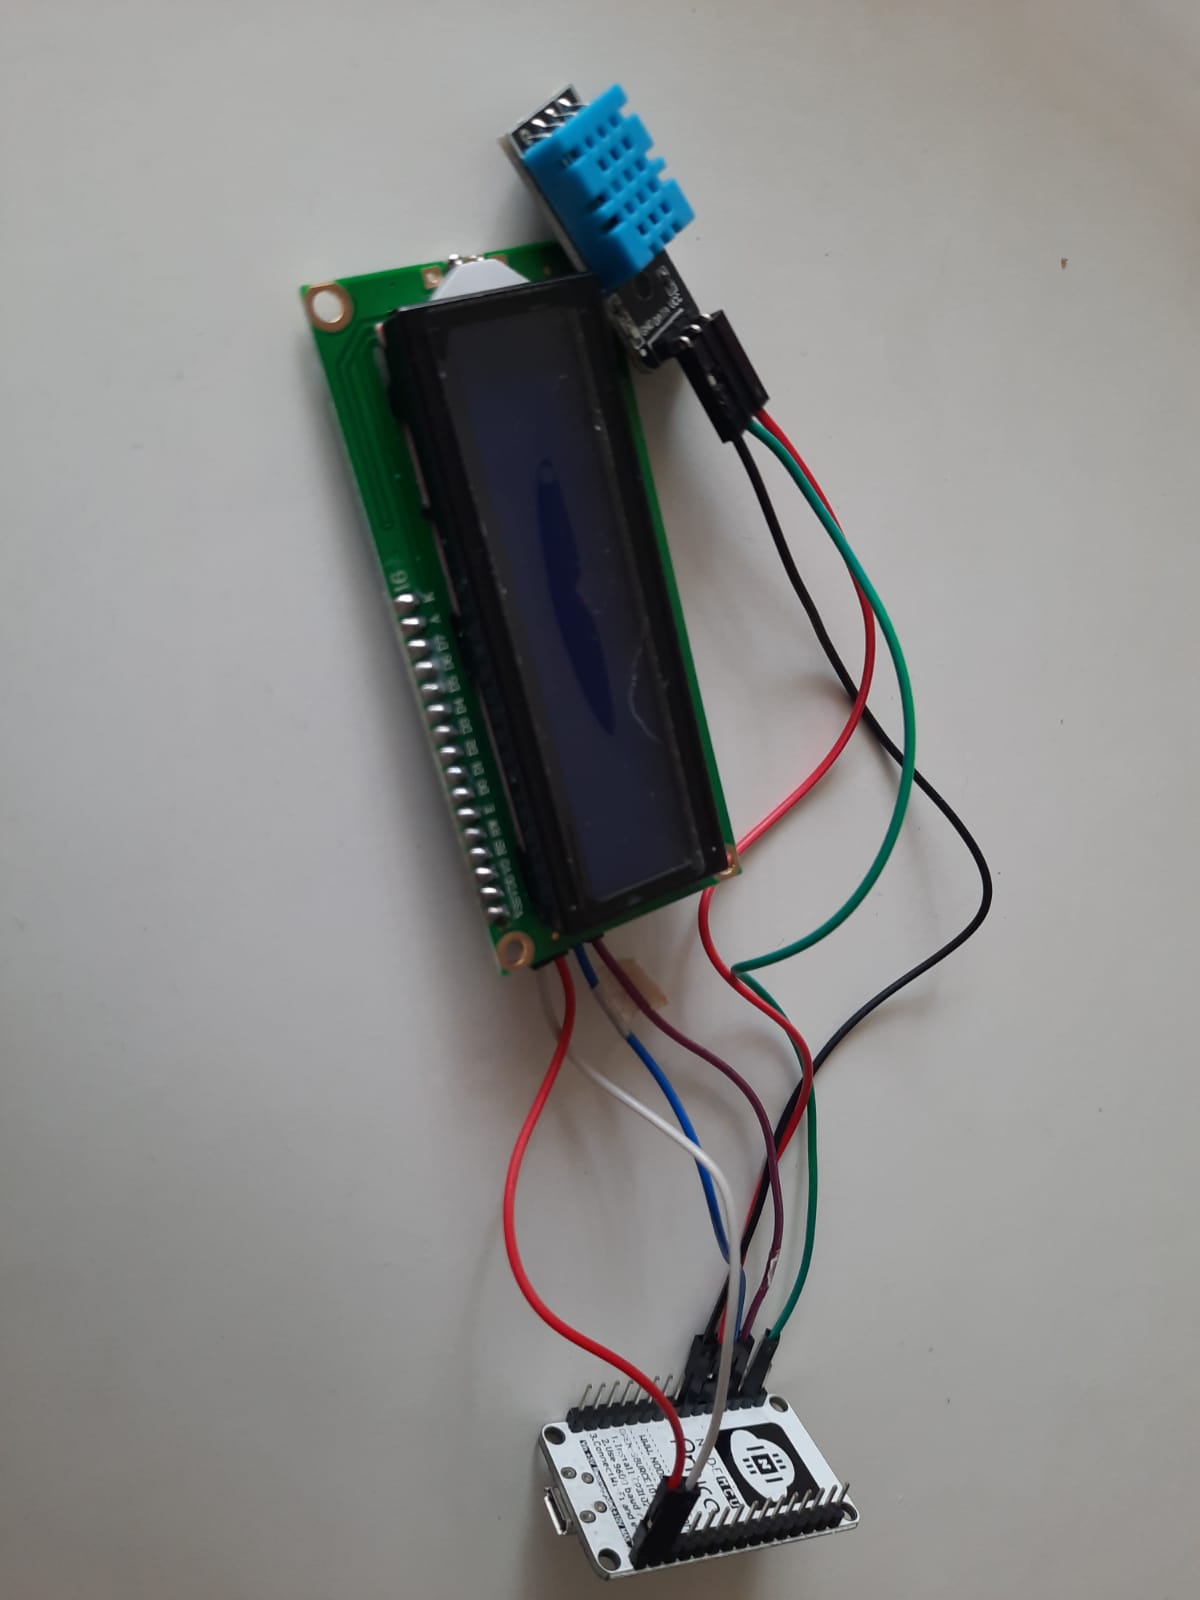
- ESP8266
- DHT11
- 16*2 LCD-I2C Display
- Jumper Wires
- USB Cable
ALL PICTURES SHOWN ARE FOR ILLUSTRATION PURPOSE ONLY.ACTUAL PRODUCT MAY VARY
Steps for the project
- Installation of Arduino IDE.
- Install the ESP8266 board.
- Install Libraries required for the project.
- Connecting ESP8266 board with DHT11 using jumper wires.
- Connecting ESP8266 board with LCD-I2C display using jumper wires.
- Test the circuit.
- Copy and Make changes in the project code to Arduino IDE.
- Upload the program.
- View the Temperature and Humidity readings.
1. Installation of Arduino IDE
Adrduino ide can be downloaded from:
https://www.arduino.cc/en/software
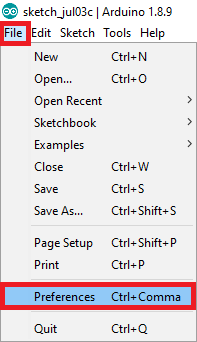
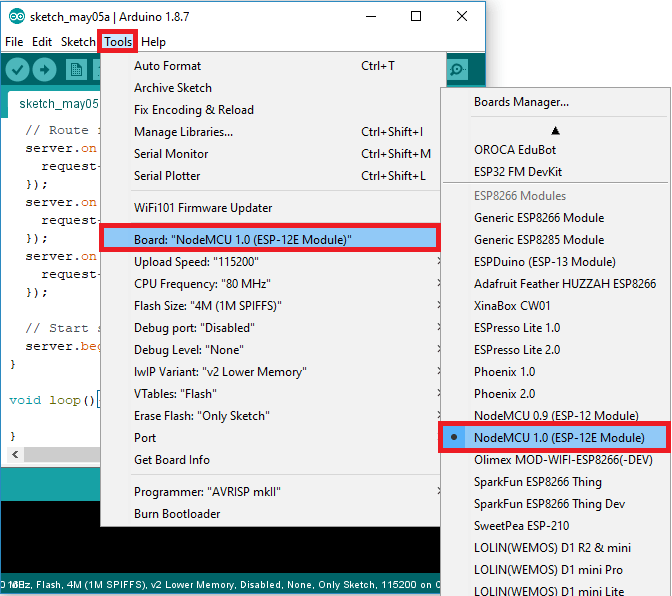
2. Install the ESP8266 board
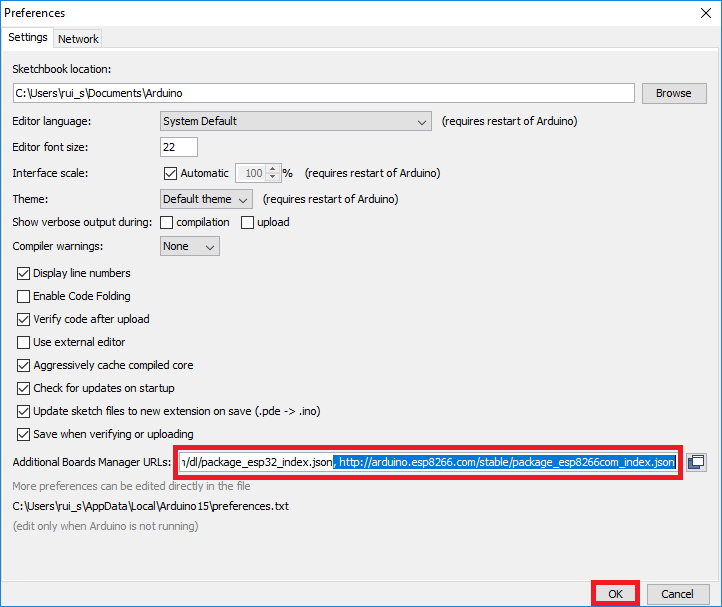
A. In your Arduino IDE, go to File> Preferences
B. Enter http://arduino.esp8266.com/stable/package_esp8266com_index.json into the "Additional Boards Manager URLs" field as shown in the figure below. Then, click the "OK" button:
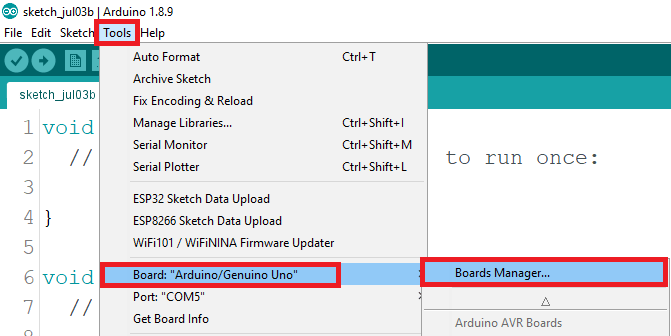
C. Open the Boards Manager. Go to Tools > Board > Boards Manager...
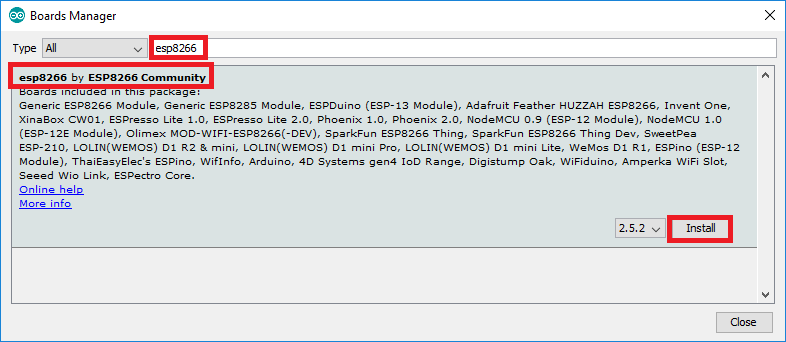
D. Search for ESP8266 and press install button for the "ESP8266 by ESP8266 Community":
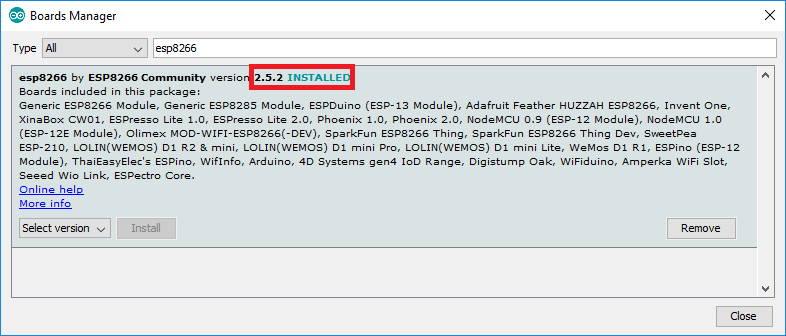
E. That's it. It should be installed after a few seconds.
F. Go to Tools> Board and select the ESP8266 12-E NodeMCU Kit..
Make sure you select right COM port, whenever ESP8266 Board is connected using USB micro cable.
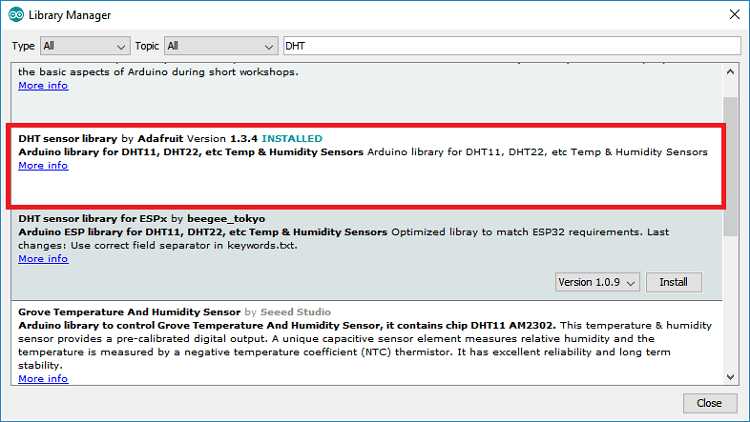
3. Install Libraries required for the project
(i) Installing the DHT Library for ESP8266
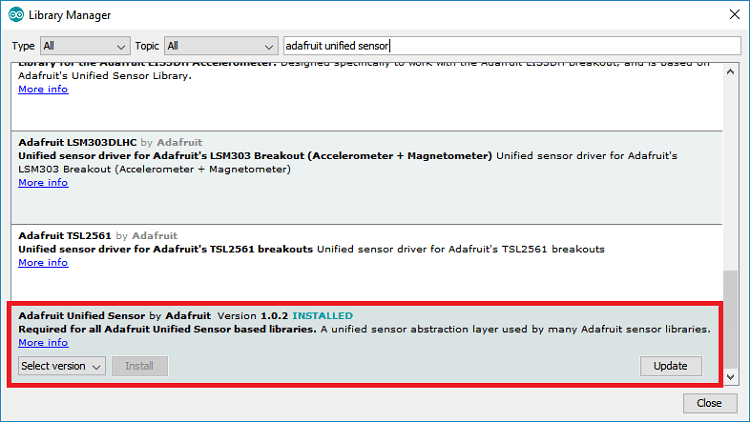
To read from the DHT sensor, we'll use the DHT library from Adafruit. To use this library you also need to install the Adafruit Unified Sensor library. Follow the next steps to install those libraries.
Open your Arduino IDE and go to Sketch > Include Library > Manage Libraries. The Library Manager should open.
Search for "DHT" on the Search box and install the DHT library from Adafruit.
(ii) Adafruit Unified Sensor library
After installing the DHT library from Adafruit, type "Adafruit Unified Sensor" in the search box. Scroll all the way down to find the library and install it.
After installing the libraries, restart your Arduino IDE.
(iii) ESP8266 ESPAsyncWebServer library
To build the web server we'll use the ESPAsyncWebServer library that provides an easy way to build an asynchronous web server. Building an asynchronous web server has several advantages. We recommend taking a quick look at the library documentation on its GitHub page.
The ESPAsyncWebServer library is not available to install in the Arduino IDE Library Manager. So, you need to install it manually.
Follow the next steps to install the ESPAsyncWebServer library:
- Click here to download the ESPAsyncWebServer library. You should have a .zip folder in your Downloads folder
- Unzip the .zip folder and you should get ESPAsyncWebServer-master folder
- Rename your folder from
ESPAsyncWebServer-master to ESPAsyncWebServer - Move the ESPAsyncWebServer folder to your Arduino IDE installation libraries folder
(iv) ESP8266 Installing the ESPAsync TCP Library
The ESPAsyncWebServer library requires the ESPAsyncTCP library to work. Follow the next steps to install that library:
- Click here to download the ESPAsyncTCP library. You should have a .zip folder in your Downloads folder
- Unzip the .zip folder and you should get ESPAsyncTCP-master folder
- Rename your folder from
ESPAsyncTCP-master to ESPAsyncTCP - Move the ESPAsyncTCP folder to your Arduino IDE installation libraries folder
- Finally, re-open your Arduino IDE
(v) Installing LiquidCrystal-I2C Library
The LiquidCrystal-I2C library requires the LiquidCrystal-I2C library library to work. Follow the next steps to install that library:
- Click here to download the LiquidCrystal-I2C library. You should have a .zip folder in your Downloads folder
- Unzip the .zip folder and you should get Arduino-LiquidCrystal-I2C-library-master folder
- Rename your folder from
Arduino-LiquidCrystal-I2C-library-master to Arduino-LiquidCrystal-I2C-library - Move the Arduino-LiquidCrystal-I2C-libraryfolder to your Arduino IDE installation libraries folder
- Finally, re-open your Arduino IDE
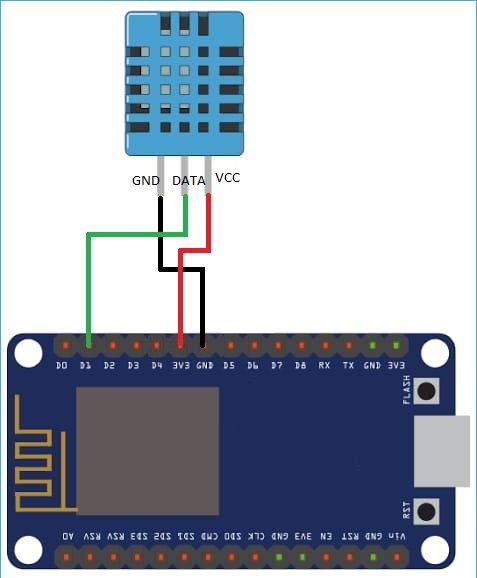
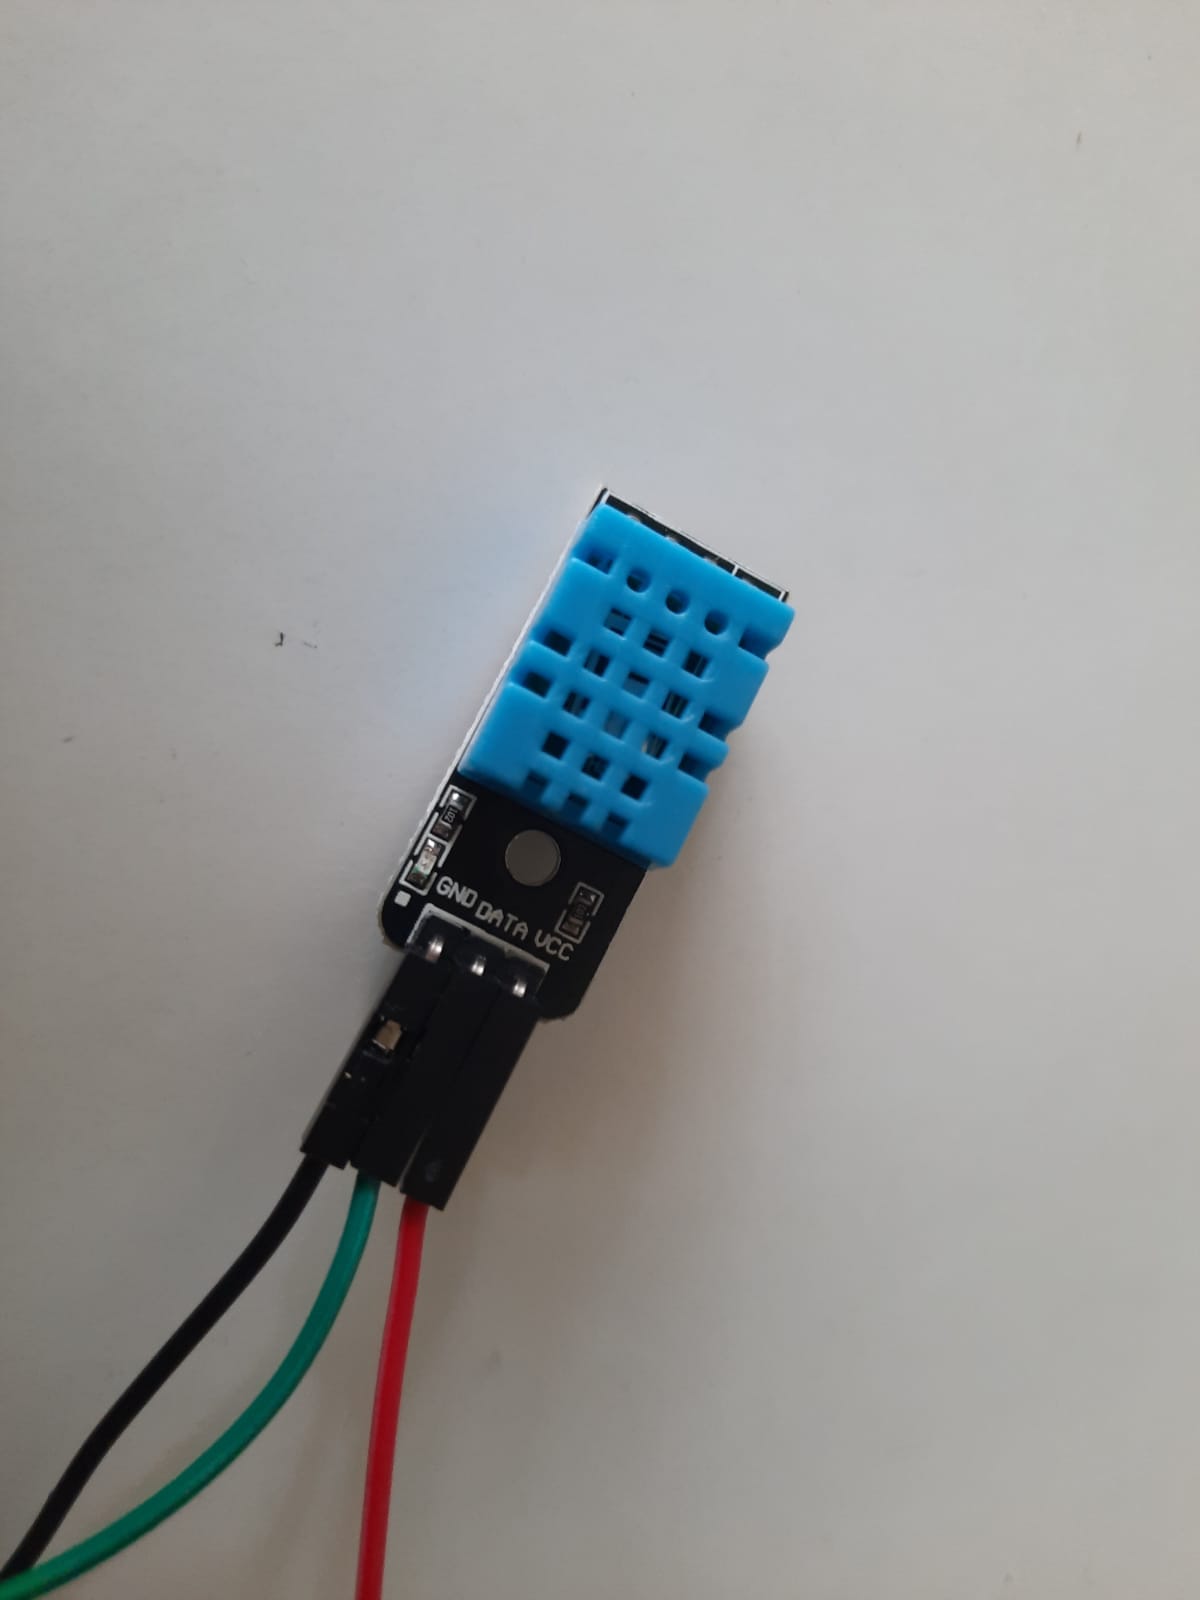
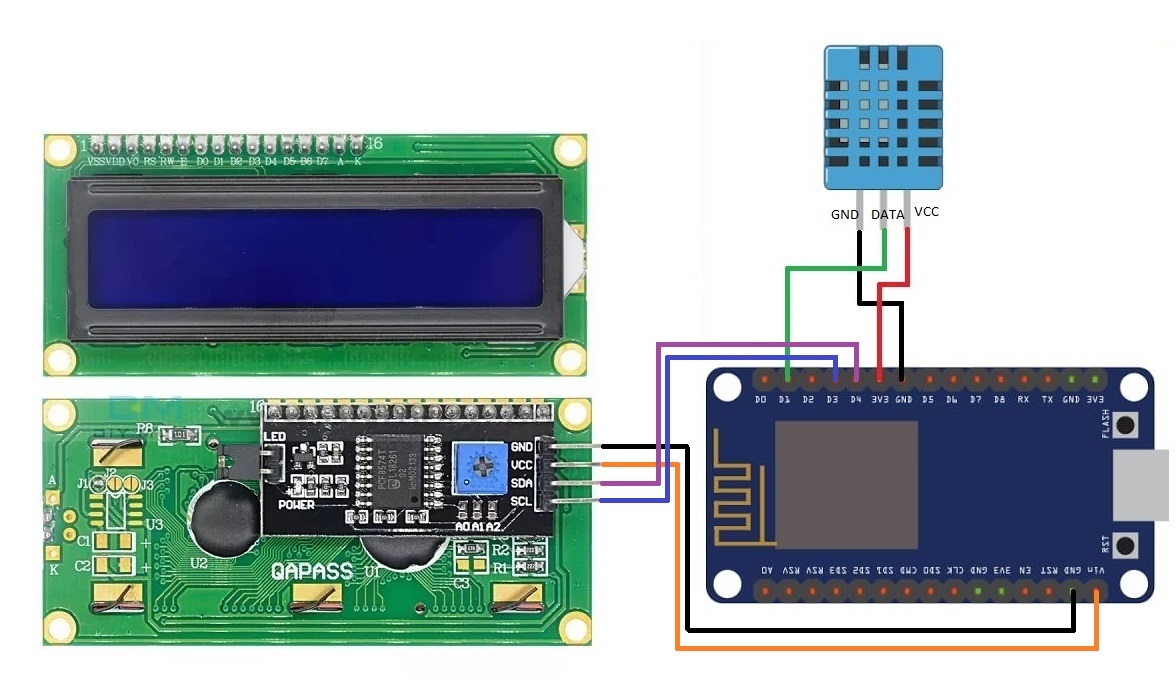
4. Connecting ESP8266 board with DHT11 using jumper wires
- DHT11 G-ground -to- GND on ESP8266
- DHT11 N-power -to- 3V3 on ESP8266
- DHT11 D-Data -to- D1 on ESP8266
5. Connecting ESP8266 board with LCD-I2C display using jumper wires
- LCD I2C GND -to- GND on ESP8266
- LCD I2C VCC -to- VIN (5V) on ESP8266
- LCD I2C SDA -to- D4 on ESP8266
- LCD I2C SCL -to- D3 on ESP8266
6. Test the circuit
After connecting ESP8266,DHT11 and LCD-I2C using jumper wires, connect the USB cabel to either a mobile charging adaptor or to USB port of a computer.
On successful powering the LCD screen will display the current temperature and humidity. In case of any problem, please check the circuit and make sure that currect pins are connected.
Once correct readings are displayed, turn on your mobile hot spot or any other wifi device keeping ssid : "test" and password : "test1234".
Find ip address of the ESP device form the connected devices of the mobile hotspot created. Open any browser from device connected to same hotspot wifi network and enter the ip address of ESP devise in the browser../p>
The browser will display the Temperature and Humidity reading remotely using the wifi network. Your wirings are successful.
7. Copy and Make changes in the project code to Arduino IDE
You will be provided the project code through email, on registration of the kit. Copy the project code to newly created file in Arduino IDE.
From the codes you will observe that ssid : "test" and password : "test1234" are written.
You can change by writing your wifi device ssid and password details in the codes.
8. Upload the program
Upload the program by selecting Upload from the menu of Arduino IDE or the Upload button provided on the menu bar.
9. View the Temperature and Humidity readings
Find ip address of the ESP device form the connected devices of you wifi network. (Mobile hotspot wifi network with ssid 'test' is no longer required). Open any browser from device connected to same wifi network and enter the ip address of ESP devise in the browser../p>
The browser will display the Temperature and Humidity reading remotely using the wifi network.